Here is our Music Video:


Below are the front panels of our digipak:

Below are the outside panels to our digipak.

Below are the outside panels to our digipak.

Below are the inside panels to our digipak.

Below are the inside panels to our digipak.

Click on the image below to access our website.

Saturday 23 December 2017

Construction Post 6: Week 6 Website post-production

OVERVIEW

Overall working on the website was very successful, I found that I was most comfortable when doing this task.  We used Wix which had a very convenient and simple format which made it easy to use. It had many features that made up a professional website, for example the built in code which showcased different social media feeds and the available online store template which we used for the merchandise section of our website.

To see the website, use this link on a separate page.

https://latymermedia2016.wixsite.com/latymergroup2

WHAT WE  WANTED OUR WEBSITE TO HAVE
1. Lots of interactive opportunities
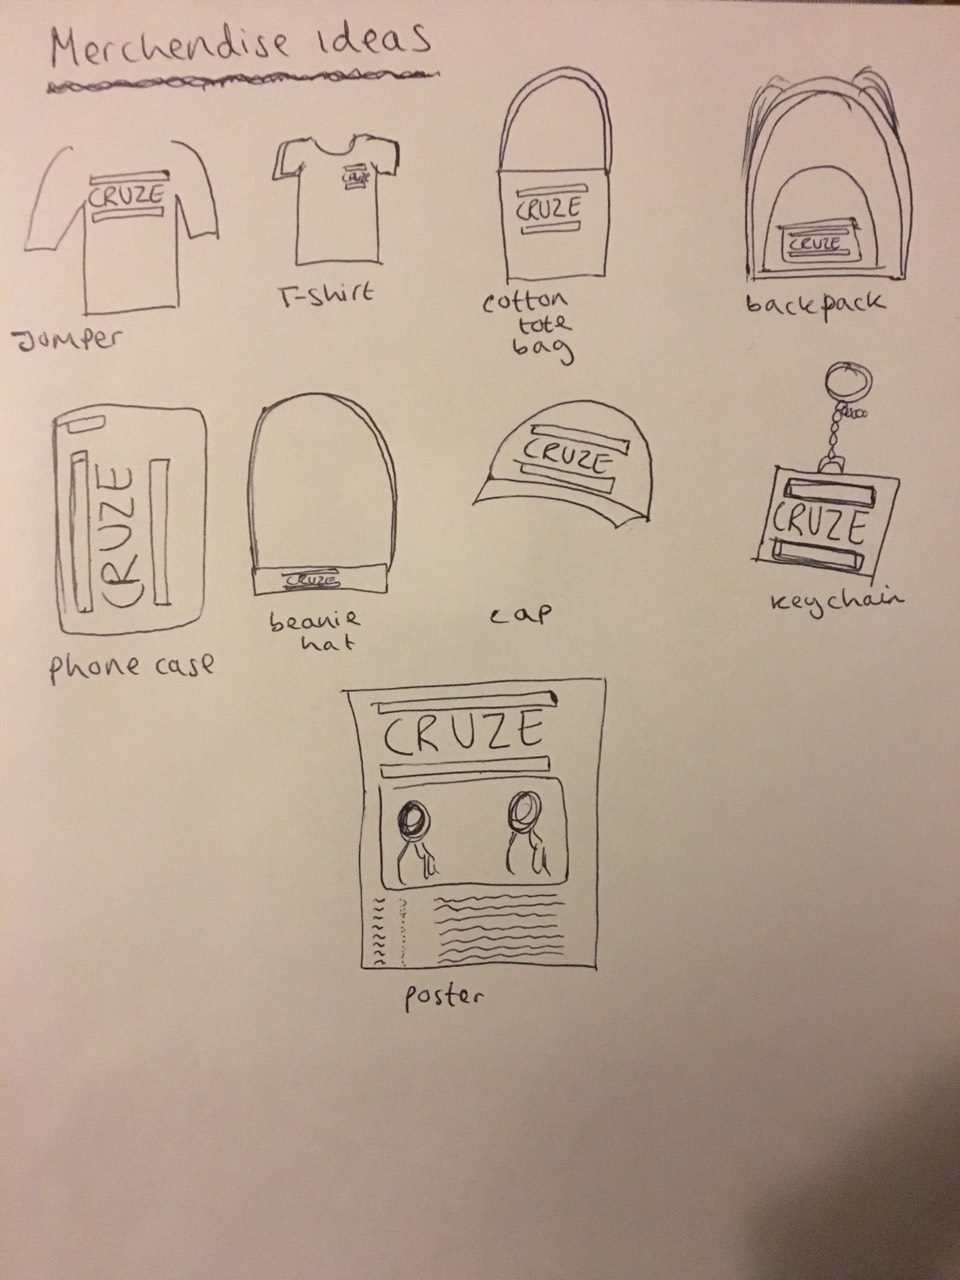
2. Online store - For merchandising
3. Information - To allow the audience to have an in depth view of the artist

MY CONTRIBUTION TO THE WEBSITE

1. I had the task of setting up the website and creating the various pages: Home, About Me, Music, Tour, News and Shop. I completed the header which featured the menu bar and the social media links.
2. I designed the overall look of the "About Me" page - I included different types of reviews from magazines, companies and artists. As well as designing an interactive question and answer section with images from our photoshoot. I also included an Instagram feed with photos I edited using photoshop as well as the "Picsart" application.
3.  I included the correct links to the social media pages Twitter and Instagram. I added all the pictures on the Instagram and edited them on various photo edit applications. I also added all the tweets on the Twitter feed

4. I designed the overall look of the "News" page -  I included promotional content for upcoming live performances as well as meet and greets. I also included a twitter feed so that consumers could see more frequent updates.
5. I set up the final online store with the merchandise as well as adding each products information such as how it should be washed, what it is made out of, if it was on sale etc, refund policy and the shipping policy.


AUDIENCE FEEDBACK

I spoke to people who are apart of our primary and secondary target audience and asked them for their opinion on the website we created.

They thought that focal images on all of our respective pages were very good, vibrant and that it looked extremely professional. They were very impressed with the editing of the photo. Making the focal images very popular.

They appreciated the fact that the social media links were readily available on every page so that they could click it if they wished to without any issues.

They thought navigation was hard as some of the pages weren't correctly linked - this issue was fixed after going through each page and its settings. Other than this they believed that the website was very clear, nothing that was written confused them at all.

They all thought that the about me page was a nice touch however they thought I should make it more interactive - prior to the change all the question and answers were written out without any images or interactivity. I fixed this according to the advice I was given, overall this was very useful as adding an engaging about me page definitely made our website all the more interesting and unique.

Overall: I am happy with the advice and feedback that we were given as a lot of it we were aware of and knew could be easily fixed. After implementing the feedback our website was now new and improved, even better and easier to use.

REFLECTIONS

> Problem 1: The header menu was inconsistent as buttons were linked to multiple pages when it should have been linked to only one 

This meant that the menu on the header did not always correspond to the page that the fan would want. This inconsistency was very problematic as it meant that if a fan were to use our website and they clicked on a specific button and wanted to go to a different one they may or may not reach it, overall reducing audience satisfaction. This issue made our website look unorganised and as a result unprofessional. To overcome this issue we made sure 1 button was linked with 1 page rather than however many pages and that it was linked to the same page no matter what.
This is how we linked it to the correct page 
> Problem 2 : The shop set up meant that when we included text on the page with the payment section the text would show up unwanted on the page which had the product images

This ruined the overall look of the shop as writing would be covering the images that needed to be exposed to the fans. We found no way around this, this issue combined with problem 2.5 meant that we needed to start from scratch

> Problem 2.5 : The shop set up meant that we were limited in the content we could include

The original online store template that we had did not allow us to include important product information that a fan may want to know when ordering merchandise, such as shipping policy and refund policy. To overcome this and problem 2 we decided to start from scratch and use a different shop template to provide the best level of service.

> Problem 3: Setting up social media links - our twitter account was suspended

After creating our social media account for twitter it soon got suspended as it was reported as spam as there was zero activity on it for over a week. This issue was not detrimental as we simply made a new one, although this delayed the social media aspect of our website it did not affect our project heavily.

In conclusion 

I am happy with the overall product that is our website, I had a great time learning how to use Wix and creating the social media sites and much more. I think that the overall website is very coherent and synergetic as it follows the aesthetic of our music video as well as the album cover.

Friday 22 December 2017

Construction Post 5: Week 5 Digipack post-production

DIGIPACK OVERVIEW

Overall, the process to complete the digipack was fairly successful however still very challenging. This was my first time using photoshop officially and I had many things to get used to. However the process was made much easier through the step by step guide that was provided to us by our media teacher and the demo walkthrough conducted by the media technician. Both of these helped me improve my skill and gain experience with the software. The software was useful, fun and intellectually stimulating. My favourite part of photoshop was the fact that I had the ability to create and enhance images. Below is a picture of me editing on photoshop.

WHAT DID WE WANT FOR OUR DIGIPACK?

1. A creative and fun design to match the fun and care free genre of House/R&B
2. Really clear mid shots of our do for the front and back panel
3. Details: spine information, tracklist, record label, copyright information

AUDIENCE FEEDBACK WHEN CONSTRUCTING THE DIGIPACK

The first step we took was deciding the two images we were going to use for our front and back cover as well as the background images. After choosing them we decided to show them to a small focus group to see what they thought about the images.

Below are the three pictures we showed

Picture 1 - Front cover

Picture 2 - Back cover


Picture 3 - Background image


Response to Picture 1: It was agreed that the picture was nice however what really let it down was the lack of symmetry which really drew the eyes away from the artist and to the flaws of the image.

Response to Picture 2: It was agreed that this photo was also nice but comments regarding its 'dullness' were made.

Response to Picture 3: Everyone liked the background and thought it was very cool and gave the album a more professional look.

Overall: Our focus group thought all three images worked together well and weren't in anyway clashing - advice that was given was to make the images more vibrant and lively

MY CONTRIBUTION TO THE DIGIPACK

1. Front Panel

   I picked the font choice

   I added the artist name

   I added the album name


2. Back Panel

I picked the font choice

I added the track list

I added the barcode

3. Spine

I added the artist name


I added the Album name


I added the record label


FINAL PRODUCT: OUTSIDE PANELS

After working on the outside panels, this was the finished product


Below is how I responded to the audience feedback.

Picture 1: We photoshopped the T-shirt so that it would look more symmetrical, as well as this we carefully placed the album title and artist name in the same region so that the writing would catch the eye of the audience rather than the neck line. We also added more contrast to the photo so that it looked more youthful and lively.

Picture 2: We added a pink tint to this picture for the same effect - making the artist look more youthful and lively. We also used softwares like 'skin smoother' to give the picture a more airbrushed and professional feel.

Picture 3: We changed the white clouds to one that is light pink so that it would fit the overall youthful theme we were striving for. As well as this we carefully cropped out the blue space in the original picture so that there was less wasted space.

Extra conventions: our track list on the back panel is a dark pink colour which matches the clouds, the album font, the pink lips and the pink tint on picture 2. We also placed the logo of the record label on the back panel to increase the level of awareness for the record label, this is a very common convention. Other bits were added, such as the barcode and the copyright information which is standard on a album cover

REFLECTIONS

Overall, I found creating the digipack very fun and insightful, it allowed me to develop my skills in photoshop and image editing, enhancing the promo shots to make them digipack ready as well as working with different fonts. I liked working on photoshop, it was a great experience as it allowed me to develop my skills. I definitely learnt a lot from the development of the digipack.

Construction Post 4: Week 4 Music Video post-production

THE SOFTWARE I USED

The menu we used
I used Adobe Premiere Pro which was very useful as it allowed me to edit, adjust colouring through grading and refine audio all in one seamless and integrated workflow. This was a software that I was already familiar with through my experience with AS media. I found many tools particularly useful, the one that saved the most time was the mini menu bar which allowed me to separate all the footage into different branches, for example "Location shoots" which then opened into two separate folders "Brick lane" and "Wood Green" which had its own mini folders. This was extremely useful as this organised menu made it very easy to find specific shots that I needed. The grading tool was also very useful as it allowed me to refine colour to make the different shots as bold and bright as it could be to match the overall feel of the music video which was a "hype party" atmosphere

MY CONTRIBUTIONS TO THE VIDEO

1. After speaking my media teachers, it became clear that the projection shots were a clear favourite, as a result I increased the shots level of exposure by adding more of it to the music video.

2. I added more shots during different parts of the song to match the fast paced nature of the song and beat

3. I graded some shots to refine colour, making it look much more striking and vivid

4. I also removed shots which took away from the overall feel of the music video and replaced them with ones that enhanced the idea that we were trying to create

Below are two videos I edited 


REFLECTION ON AUDIENCE FEEDBACK

Overall, we received extremely positive feedback. The fan favourites included the rooftop scenes and the car scenes with the friends which we as a group really liked too. I'm particularly proud of this as it is something I pushed for from the beginning stages of research and planning which we even included in our steal-o-matic. In terms of criticisms, what was common of all responses was the issues behind the narrative, which many believed had appeared unnatural and forced. This did not come to a surprise to us as we had already spoken about the complications of narrative when there were no experienced actors, which as a result created a low budget effect. As a result we cut out what was once a vital narrative scene to ensure that the 'bad acting' did not create a lasting impact as before it broke realism.


OVERALL REFLECTION

We set out our roles in a way that meant that one individual worked on one ancillary product a week, however as I was the last person to work on the music video, most of it was already completed. My main role was to add the final shots there were missing and to then look over what was completed and create a list of improvements I believed should be made. After I gathered a report for audience feedback to provide my group with an outside perspective. If I could do anything differently it would be to have more of an active role throughout the construction of the music video from beginning, middle and end so that I was involved in a lot more and went through the full experience.

Construction Post 3: Week 3 production

WHAT WAS ON THE AGENDA?

1. Completion of the studio shoot week

STUDIO SHOOT WEEK OVERVIEW

Production week 3 was the intense studio shoot week which we had long been preparing for. The schools high tech and professional studio was well equipped, it had an available sound desk, a portable lighting kit as well as overhead industrial lights. All this made the process to creating a high quality music video much easier. The shoot week went incredibly smoothly with no major complications, as a result our expected 5 day shoot week had turned into a 3 day shoot week, this implication was as a result of the late nights and because of the little amount of set-ups we had. Below are the 4 set ups that we used for our studio shoot.


REFLECTIONS

Below are three problems that we faced during this week.

> Problem 1: The repetitive characterisation issue

As we had dealt with this complication before and consulted with both our media teachers we now knew how to go forward in terms of extras. Instead of using the bad footage of the extras from earlier in our production week we had asked two girls from our media class, Meera and Sian, who we knew were experienced, understood direction and knew the level of professionalism we expected them to uphold. They were perfect and efficient and the clips we had produced were a huge improvement to the previous group shots.
Below is a clip of Meera and Sian which we used.


> Problem 2: Aesthetic issues

When filming our siren shot set up, we used a curtain to create the effect of a black background. However, there were many unavoidable creases in the curtain which ruined the overall appearance of the shot making it look unprofessional. To overcome this issue we had two people standing on either side of the shot pulling the curtain towards them to straighten it out - this was effective as when we watched the clip back, no creases could be spotted.

> Problem 3: Shot types

After a mid-week consultation with our media teacher, it had come to our attention that a lot of our shots were static and stagnant which lost the natural and loose feel that we wanted to cultivate in our music video. Consequently we got back up to the studio and reshot everything with only handheld shots so that we had more fluid content to cut back to. This proved very useful in post production when we wanted variety.


MY CONTRIBUTIONS TO THE SHOOT

1. I was the lead singer in our artist duo 'Cruze' and as a result the main focus of the production - this meant that I lip synced throughout and acted.
2. I was in charge of all extras - I gathered them to participate in our music video and briefed them on what costume they needed to bring, the health and safety regulations, how they were meant to act and overall what they were expected to do - I made a group chat for this
3. I directed many of the performance shots as well as narrative shots for example 1:42-1:54
4. I provided the costume in the music video
5. I filmed handheld performance shots
6. I helped set up the studio in the beginning of the shoot day as well as helped set up the different set ups.

Construction Post 2: Week 2 production

WHAT WAS ON THE AGENDA?

1. Completion of the 2nd location shoot
2. Completion of the 2nd photoshoot for our digipack

WOOD GREEN LOCATION SHOOT OVERVIEW

For production week 2, we had our second location shoot in Wood Green. This shoot was not extremely successful as we could have gotten a lot more shots, however as a result of a challenge, the limited footage was unavoidable. But we did get one really good shot that we were proud of which we did repeat in the music video. Below is a still image of the shot

REFLECTION
Below are arguably the biggest problems we faced during construction.

> Problem 1 : Low battery

Whilst on our "Wood Green: Location Shoot" two of our batteries were insufficiently charged. This meant that we had a sudden time constraint. As a result we all needed to work much faster and much more efficiently as we had no room for mistakes and no room for reshoots to be made. However, this did not turn out to be a catastrophic issue as our extras were very understanding and were willing to accommodate to the new found issue. In fact the battery scare meant that they were much more serious, productive and willing to get things done.

> Problem 2 : The characterisation process of all extras was not fully complete.

This was a problem we faced before, we started off with a quick brief explaining the role that each individual had to play and followed by showing examples of this through our actions. However, although we done this, the extras were still not fully receiving the message as they continued to feel awkward, out of place and shy when the camera was turned on. Due to the time constraint in regards to the low battery we did not have time to spend lecturing the extras again on instructions we had already explained so we moved on to the solo shots of me that we were to include in the music video. A lesson we learned from this was to include our extras in the test shoot and also hold rehearsal sessions so that they knew exactly what to do without fail.


MY CONTRIBUTIONS TO THE VIDEO SHOOT

1. I was the lead singer in our artist duo 'Cruze' and as a result the main focus of the production - this meant that I lip synced throughout and acted.
2. I was in charge of all extras - I gathered them to participate in our music video and briefed them on what costume they needed to bring and the health and safety regulations
3. I directed many of the performance shots
4. I provided the costume in the music video

PHOTOSHOOT - FOR THE DIGIPACK

OVERVIEW

This was a very successful shoot and was very productive. We completed this task in Brick lane, we were well equipped with a tripod and a DSLR camera. We took many shots with different poses to help make the photo interesting.

REFLECTIONS

Below is a problem we faced

> Problem 1: Interruptions

Whilst shooting for the digipack inside panels we were interrupted plenty of times by cars which ruined our shots.

This meant that we had to be patient and be smart about when we would take our pictures, soon after we changed our location to a place that was much more secluded that didn't feature a road between the tripod and Ray and I, therefore removing the issue at hand.

MY CONTRIBUTIONS TO THE PHOTOSHOOT

1. I was in the pictures
2. I done my own make-up
3. I provided the costume
4. I took some photos that I was not in
5. I helped adjust the lighting

Construction Post 1: Week 1 production

WHAT WAS ON THE AGENDA?

1. Completion of the 1st location shoot
2. Completion of the 1st photoshoot for our website

BRICK LANE LOCATION SHOOT OVERVIEW

Our first week of production was very successful. We shot on location so we had to consider factors, such as weather, health and safety as well as ensuring that we didn't shoot in a busy place where we would have many interruptions. Overall, we managed to get all of our shots without any major issues, we had many takes that we could choose from in post-production, all of which included varying camera angles and shot types. Below is a picture of the location we shot in.

REFLECTION

When reflecting over the week it became clear that we had only faced two challenges during our shoot, however due to the groups determination we found solutions to them all, making production week 1 overall, very successful.

Below are two problems

> Problem 1: Getting all of the extras to our "Brick Lane: Location Shoot" proved challenging as a result of a number of issues. 

We had expected a total of 5 extras to come in, however only 4 showed, this meant that my group and I needed to deliberate to see how we could overcome the loss of one of our music video characters which inevitably took up a lot of our shoot time, causing us to be behind schedule. However, we did not let this ruin the shoot and instead we pushed on and created the illusion of a larger group by standing closer together. Similarly the cold weather of the day affected the morale of the team making the extras less energetic and less enthusiastic. To overcome this, we lightened the mood by playing music we also ensured that each individual was engaged in a role so that they were not lethargic.

> Problem 2: The characterisation process of all extras was not fully complete.

Before we started filming we had a quick brief explaining the role that each individual had to play, a character that was fun and care free. However, we failed to show them examples of this through our actions or even visual aids. This meant that the extras were not conclusively sure as to what they were expected to do. This meant that they would get out of character accidentally, laugh whilst the camera was rolling or look to the side. All these things worked together to create a bad and useless clip. This meant that we had to constantly take multiple clips of the same shot as many mistakes were made. To overcome this solution, the director was giving out instructions whilst the camera was rolling telling each individual what to do so that it looked more natural, authentic and professional. As well as this we gave our extras 3 moves that they could go back to if they felt as though they had nothing else to do, this in effect kept up the atmosphere that we were trying to cultivate proving to be a useful technique.

MY CONTRIBUTIONS TO THE SHOOT

1. I was the lead singer in our artist duo 'Cruze' and as a result the main focus of the production - this meant that I lip synced throughout and acted.
2. I was in charge of all extras - I gathered them to participate in our music video and briefed them on what costume they needed to bring, the health and safety regulations, how they were meant to act and overall what they were expected to do
3. I directed many of the performance shots as well as narrative shots
4. I provided the costume in the music video

PHOTOSHOOT - FOR THE WEBSITE

OVERVIEW

This was a very successful shoot and was very productive. We completed this task in the mini studio that was set up. This studio was well equipped, it had a makeup station, costume station as well as light diffusers and a propped up white background to add to the professional look. After a demo with the helpful media technician I was able to use the digital camera as well as the light diffusers, to create a high quality picture. We took many shots with outfit changes and various shot types to help make the photo more interesting.

REFLECTIONS

Below are three problems we faced

> Problem 1: Shadows 

As a result of the portable lighting kit, there was strong light shining on my face and so if I raised my arm, a large shadow would be cast on my skin. This meant that a good pose was rendered useless as it would have looked unappealing as a result of the unwanted shadow. Below is an example of a picture with a shadow.
> Problem 2: Lack of variety in terms of posing

Although there were subtle and slight variations to the posing of certain photos, none of them appeared extremely different to the other. This meant that it looked less creative and innovative. Below are 3 pictures of our promo shots which express this issue.


> Problem 3: Time constraint

We did not have much time, we were in the mini studio for 4 periods only, during this time we needed to switch outfits, review pictures, touch up on hair and makeup. This pushed our group to work effectively and efficiently to produce good content to be used for our digipack and our website. Below is one of our favourite close up shots.

MY CONTRIBUTIONS TO THE PHOTOSHOOT

1. I was in the pictures
2. I done my own make-up
3. I provided the costume
4. I took some photos that I was not in
5. I helped adjust the lighting

Friday 10 November 2017

R+P Post 33: Reflections on my role and contribution during Research and Planning

Throughout this process I believe all three of us have put it in a great contribution into the research and planning of our music video. With each of us playing to our strengths doing what we feel most comfortable

Helping designing the website
•I drew the first draft of the websites homepage

•I drew a list of the merchandise that we will be including in the "shop" section of the site
Preforming
•As I am the main performer, most of my time is spent completing this task
•I am the singer and so I had many solo shots of me lip syncing

Organizing the actors that we will be using
•Created a group chat on WhatsApp
•Collated pictures of everyone
•Made sure they knew what they needed to wear to fit the costume theme
•Made sure they all had the numbers of everyone in the group in case of emergency
•Made sure that they knew exactly what time to meet
Directing
•I helped to direct the shots of Ray where Sayo was cameraman
•I helped to direct the shots that I was in - giving directions for what I believed we should go for (especially in terms of framing)


Creating the makeup mood board
•This was a collection of images that we were going to use as inspiration for our actors

R+P Post 32: Test shoot and rough edit

The test shoot was a very important part of our planning as we were able to see which of our ideas worked and which didn't and that we needed to rethink. We wrote down the key shots and aimed to complete all of them during the sessions.

Below is the rough edit

Down below is the Test Shoot schedule that we followed; my group is written in the colour green for the week

One of the key things we needed to do in our test shoot was creating the different lighting set ups that we were going to use or were considering using. Having these lighting set ups saved is very useful because when we get to the actual shoot week we will not need to create new set ups, they will be there and ready for us to use making access both quick and easy
Here are four example stills of different lighting set ups


Another key thing we needed to do in our test shoot was to practice the handheld camera on Alex (Ray) whilst he was getting his solo shots while he was producing music. We wanted to test this to see if the handheld aspect created the authentic and natural vibe we had envisioned.
handheld still of DJ shot
Below is a video that showcases some behind the scenes videos that we took.


Overall the test shoot and rough edit were both very useful as it gave our group a true visual representation of our ideas compared to the previous Steal-O-Matic which we relied on. As well as this, it showed us the impracticalities of our initial ideas
Below are some issues we faced:

  • Handheld camera - the closer we got the more blurry the video got
  • Projections concept - a large and unwanted shadow was in the background - the image was flickering on the monitor and the camera
  • Coloured lighting - at times it was problematic as it meant that more lighting needed to be put on my face as the colour had drowned it out
We are in a very good position for our main shoot as we have had experience in the studio and dealt with varying challenges. From here on out we need to figure out how to deal with the issues by implementing changes

R+P Post 31: My Callsheet

A call sheet is a document which has health and safety information as well as the address of each location. This was all necessary to make sure the shoot ran smoothly

Below is an image of our call sheet


The call sheet also tells the reader when each person is expected to be on set - this is to reduce the level of confusion that might take place and to ensure that everyone knew when they were needed and that they would be punctual.

Overall this document was very useful as it made the shoot run smoothly without any issues, it also gave all the information needed to others who were involved in the test shoot like the director so he knew what was going on each hour. The call sheet therefore made the process nice and simple

R+P Post 30: My Shootboard


This document is our shoot-board for our test shoot. The shoot board aspect is seen in the fact that it has our activities clearly written down as well as when they all will be taking place.
MY GROUP IS IN GREEN (TUESDAY-WEDNSDAY)


During this we didn't have any actors and so we didn't need to notify them of anything or include them in any way into this document.
Overall this document was extremely useful for the test shoot, as it meant that we knew exactly when to complete the different tasks and who was coming in at what time. There was no place for confusion as a result. This therefore made the process smooth and simple.

R+P Post 29: Rehearsals

In order to ensure that our music video would work perfectly, we had to do rehearsals to help practice before the shoot week.

My lip sync by this point was good this, this is because of the lip sync practice I done during my Preliminary task. However, I still researched for some good tips regarding lip syncs on Youtube. Below is the video I watched.


We decided to focus more on the studio test shoot rehearsal and test out everything that we had planned. 

Through this rehearsal, I was able to...
1. I was able to test my performance skill once more before the actual shoot week.
2. We were able to practice what lighting looked the best
3. We were able to rehearse the different placements of the props beforehand
4. We also made sure that all costumes looked good under the intense light (as the light had a tendency to overpower props/people under it)

This was useful as it helped me practice and get into the correct mind set. It also allowed me to  work on my performance by helping me loosen up and get comfortable.

Below is a behind the scenes video of one of our rehearsal sessions.